【系统重装】PYTHON 入门——速通版
速通版说明!!
直接输入指令验证,缺少什么就安装什么
CONDA
conda 也叫 anaconda,验证:
conda -V
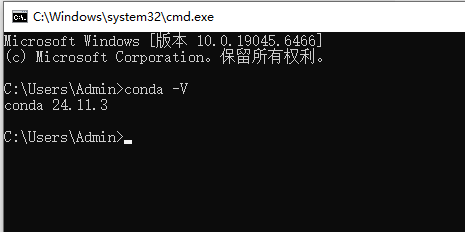
下载安装配置
如果缺少,参考这篇里面的----Win10(无gpu)https://blog.csdn.net/weixin_46022776/article/details/152517904
下载Anaconda3-2024.10-1-Windows-x86_64.exe
https://repo.anaconda.com/archive/
配置系统环境变量
D:\Environment\anaconda3
D:\Environment\anaconda3\Scripts
D:\Environment\anaconda3\Library\bin
修改虚拟环境的默认路径 (可选)
文章:https://blog.csdn.net/weixin_46022776/article/details/156308826
conda config --show
指令查看 pkgs_dirs:
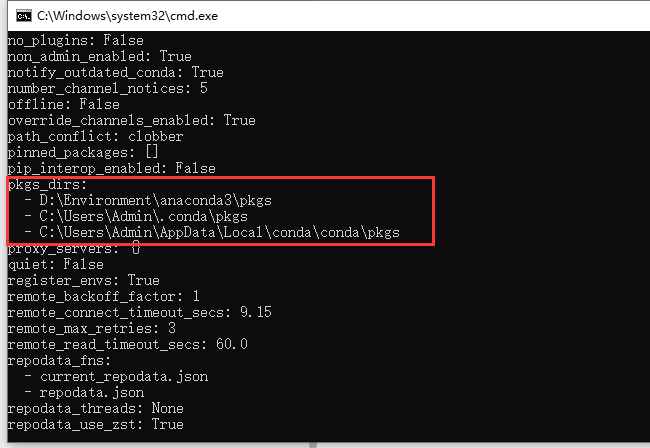
去对应目录 ,即C:\Users\Admin\ 目录修改.condarc 文件,没有可自行创建
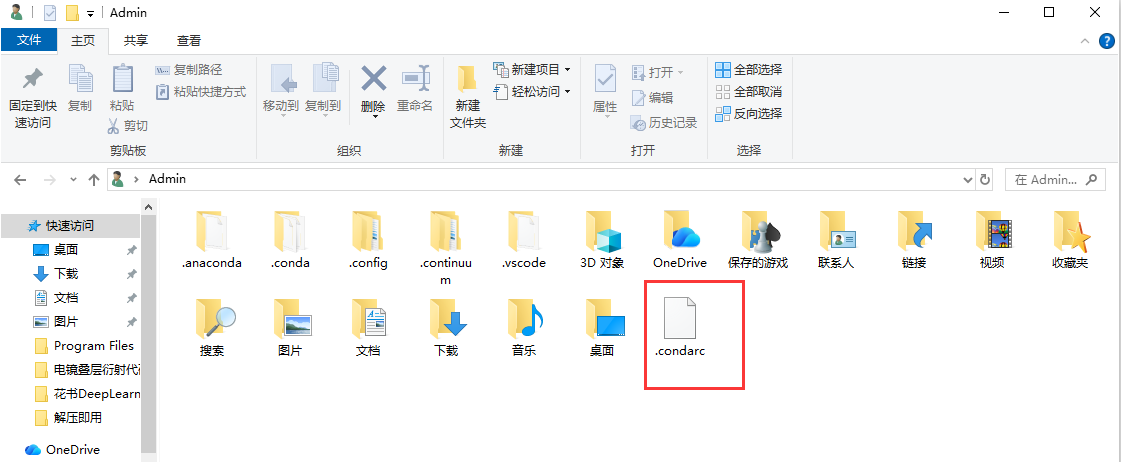
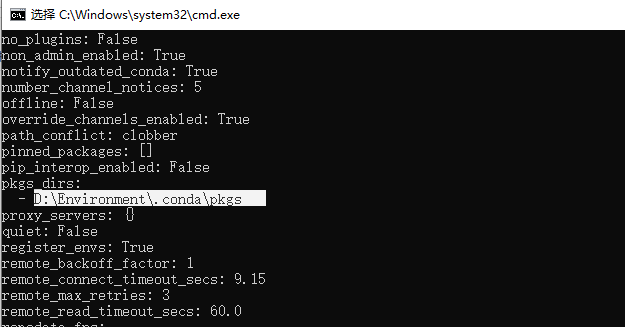
最初是只有前5行的,添加envs_dirs: 跟pkgs_dirs: 部分,修改后
channels:
  - defaults
  - https://repo.anaconda.com/pkgs/main
  - https://repo.anaconda.com/pkgs/r
  - https://repo.anaconda.com/pkgs/msys2
envs_dirs:
-  D:\Environment\.conda\envs
pkgs_dirs:
-  D:\Environment\.conda\pkgs
显卡驱动
nvidia-smi
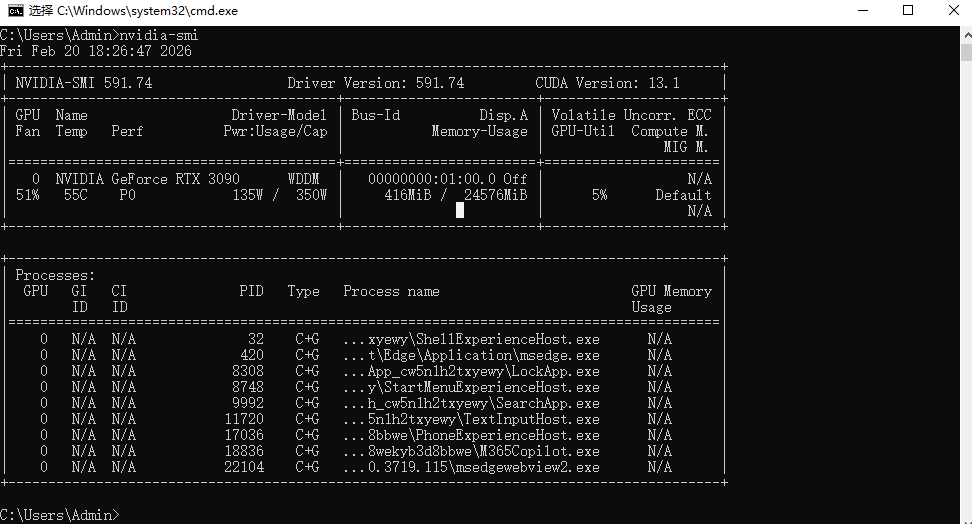
下载 / 卸载重装
上述指令如果无法显示,大概率是显卡驱动没有装,另外驱动需要更新/卸载重装,也可参考:
https://blog.csdn.net/weixin_46022776/article/details/156388392
英伟达官网驱动下载地址:
https://www.nvidia.cn/geforce/drivers/
注意:如果是做深度学习,下载类型建议选择 ❗Studio驱动程序 ❗
CUDA
cuda 能顺利安装的前提:①GPU是英伟达显卡, ②显卡驱动正常安装。
nvcc -V
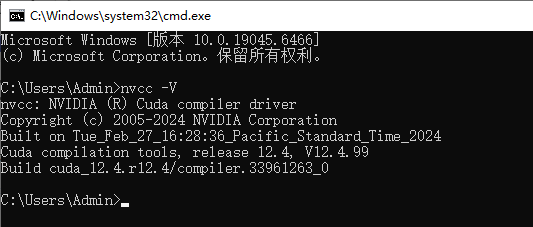
下载安装
下载: https://developer.nvidia.com/cuda-toolkit-archive
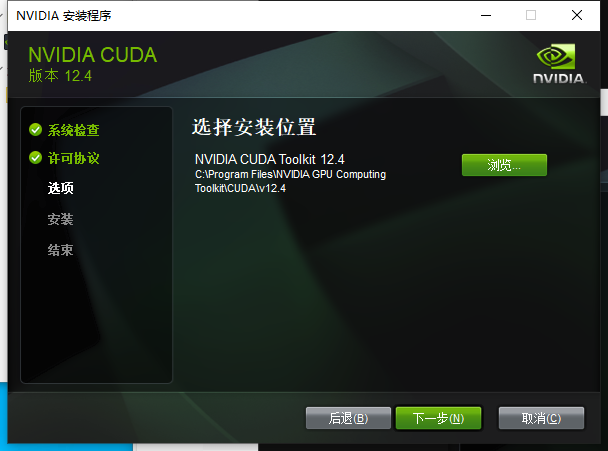
默认安装路径C:\Users\Admin\AppData\Local\Temp\cuda,自定义安装
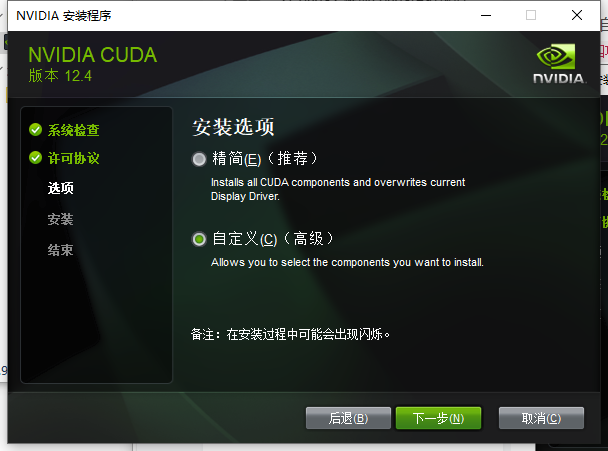
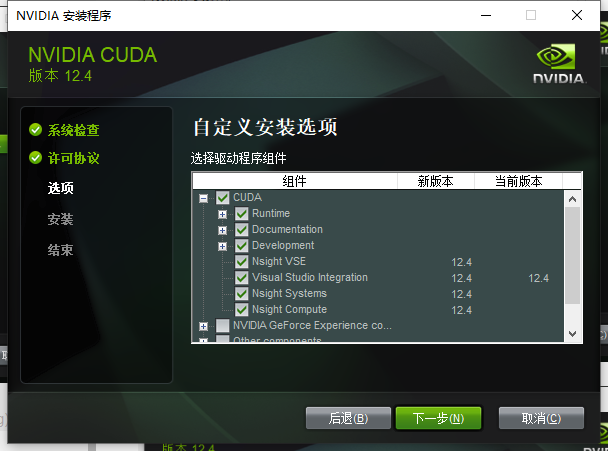
只勾选下面四个选项,别的都不选!
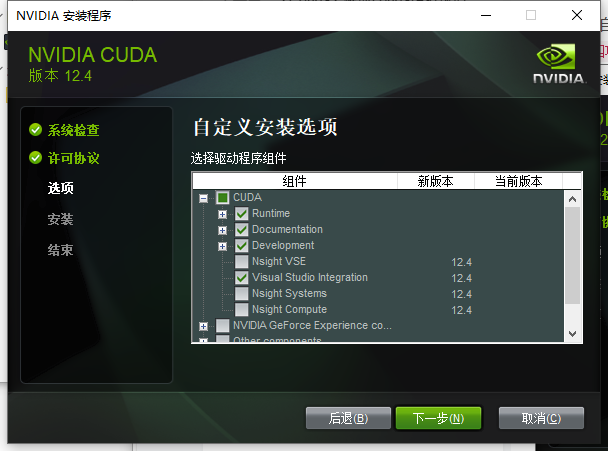
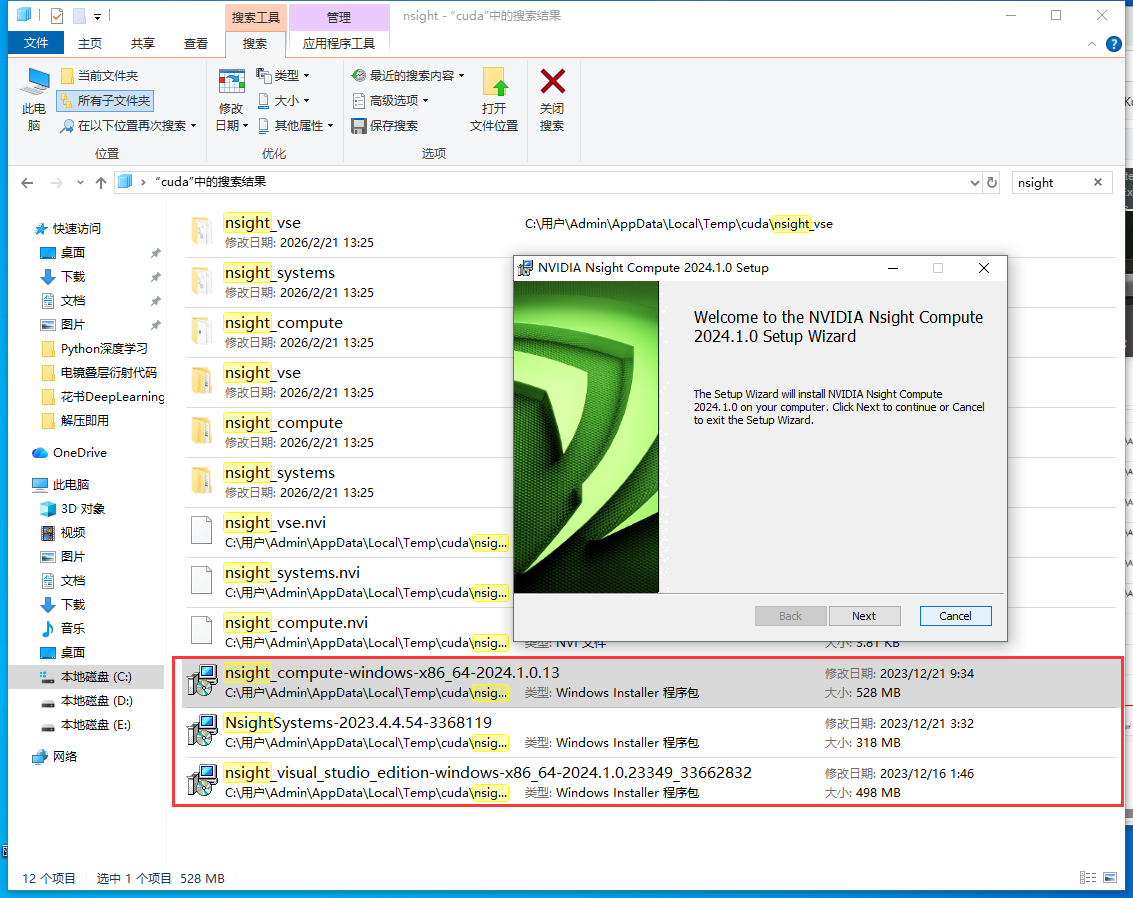
C:\Users\Admin\AppData\Local\Temp\cuda搜索nsight,手动安装nsight这三个程序 👇
安装完成后,CUDA下的选项再全部勾选,其他两个可不选
默认
勾选
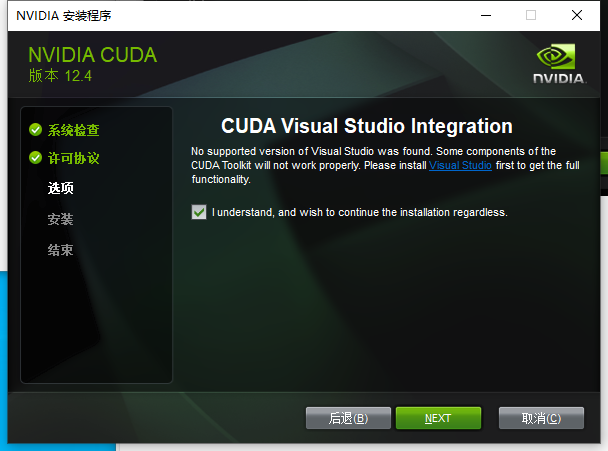
如果出现下面情况,请参考https://blog.csdn.net/weixin_46022776/article/details/156388392
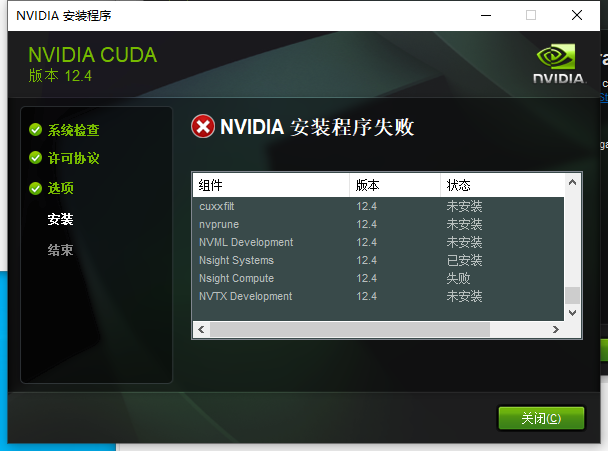
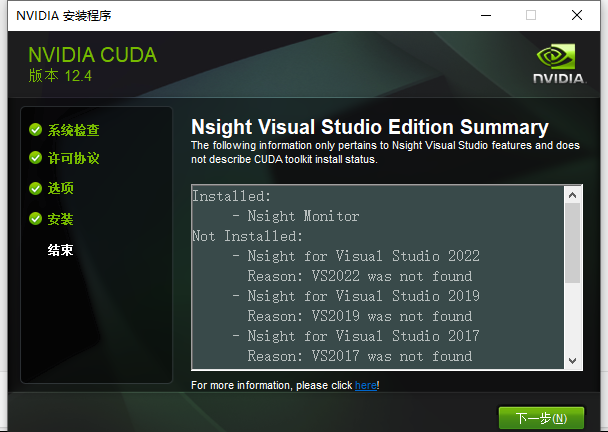
如果不是上面这个界面而是这个,代表成功安装!
创建虚拟环境
py4DSTEM、PyTorch、Cupy
https://pytorch.ac.cn/get-started/locally/
# 初始化
conda init

# 新开终端,指定py版本
conda create -n py310_test_win python=3.10
conda activate py310_test_win

# 下载环境需要的包
pip install py4DSTEM

# 前面cuda版本是12.4这里也要对应版本
pip install torch torchvision --index-url https://download.pytorch.org/whl/cu124
pip install cupy-cuda12x
测试test_env.py
# -*- coding: utf-8 -*-
import numpy as np
import cupy as cp
import time

# NumPy测试
start_time = time.time()
x0 = np.ones((100,1000,1000))
x1 = 5 * x0
X2 = x1 * x1
end_time = time.time()
print('numpy执行时间:', end_time - start_time)

# CuPy测试
start_time1 = time.time()
x3 = cp.ones((100,1000,1000))
x4 = 5 * x3
X5 = x4 * x4
end_time1 = time.time()
print('cupy执行时间:', end_time1 - start_time1)


import torch
print('PyTorch 版本:', torch.__version__)
import py4DSTEM
print('Py4DSTEM 版本:', py4DSTEM.__version__)

PyCharm
找到conda.exe可执行文件
D:\Environment\anaconda3\Scripts\conda.exe
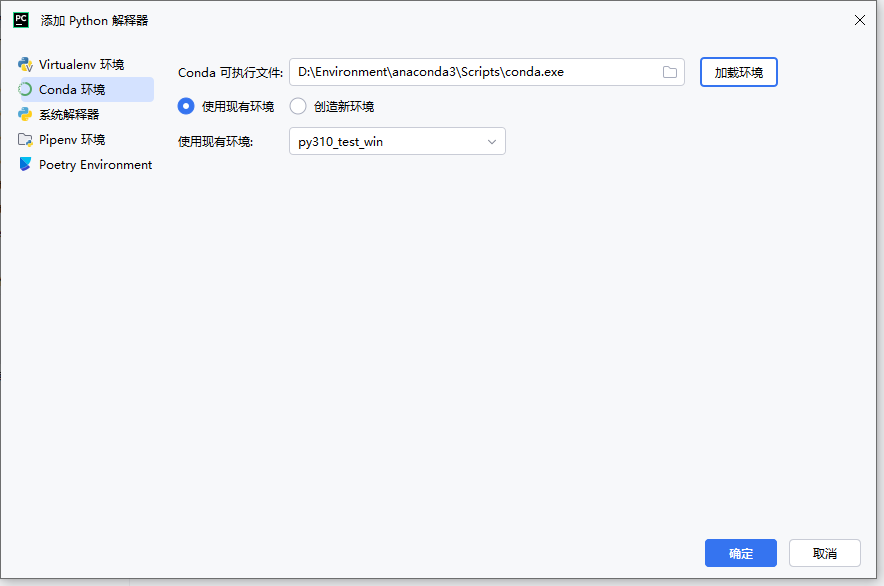
后续学习、、、
对零基础小白超友好的Pytorch教程(AI4S,科研小白无编程基础)
https://www.bilibili.com/video/BV1zK421x7EU
https://www.bohrium.com/notebooks/4914094074
小白3天速成PyTorch (讲的一般,建议有java或其他编程基础的看)
https://www.bilibili.com/video/BV1CT411q7Sw/
从函数到神经网络【AI入门01】(必看!!尤其是一些专业名词的解释非常好)
https://www.bilibili.com/video/BV1uGA3eLEeu/
组会-深度复数网络(Deep complex network)
https://www.bilibili.com/video/BV1au411o7AF

这里是“一人公司”的成长家园。我们提供从产品曝光、技术变现到法律财税的全栈内容,并连接云服务、办公空间等稀缺资源,助你专注创造,无忧运营。
更多推荐


 13
13 0
0- 0


 已为社区贡献1条内容

所有评论(0)