【OpenCV实战】答题卡识别与自动判分系统(附Python代码+透视变换)
学习笔记:使用 OpenCV 对答题卡进行透视矫正、选项检测、自动评分,适合图像处理入门项目
从零实现一个答题卡识别系统,掌握透视变换、轮廓排序、掩膜统计等核心技巧
一、核心思路
-
图像预处理:灰度化、高斯模糊、Canny边缘检测,突出答题卡外轮廓
-
轮廓检测:定位答题卡的四边形外轮廓(四个角点)
-
透视变换:将倾斜/变形的答题卡校正为标准矩形俯视图
-
答题区域检测:识别所有选项圆圈,并按题目行排序
-
答案识别:通过掩膜统计涂黑区域的像素面积,判断被选选项
-
自动评分:对比标准答案,统计得分并用颜色标注
二、图片准备
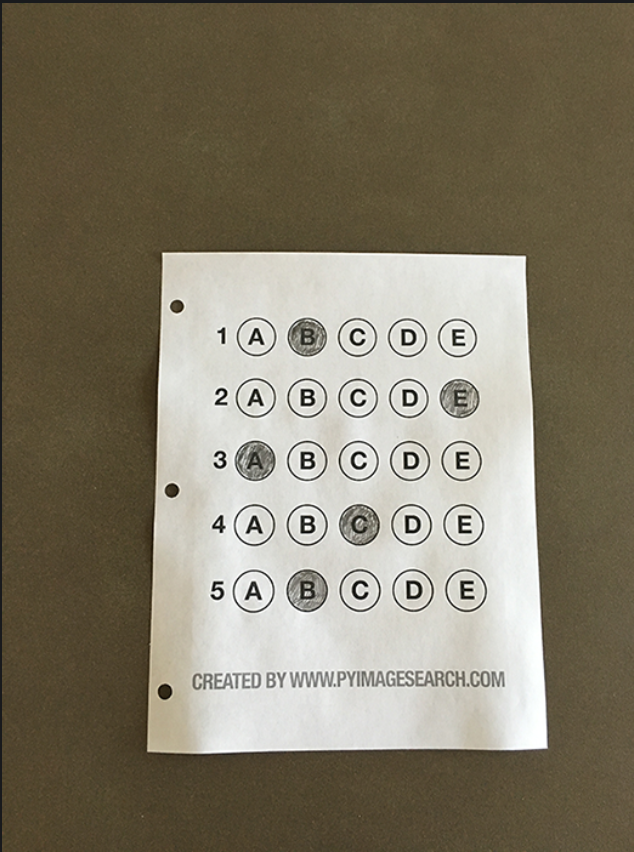
在项目目录下创建 images 文件夹,放入一张答题卡图片(例如 test_01.png)。要求:
-
答题卡外边框清晰可见(最好是深色边框)
-
选项为圆形或椭圆形,填涂区域为黑色或深色
-
拍摄时允许一定倾斜,后续会自动矫正
三、环境配置
pip install opencv-python numpy四、定义工具函数
1. 导入库和正确答案映射
import numpy as np
import cv2

# 正确答案映射:题目索引(0~4)→ 正确选项索引(0代表A,1代表B...)
ANSWER_KEY = {0: 1, 1: 4, 2: 0, 3: 3, 4: 1}
2. order_points(pts):对四个角点排序
透视变换前,必须将检测到的四个顶点按 左上、右上、右下、左下 的顺序排列。
def order_points(pts):
    rect = np.zeros((4, 2), dtype="float32")
    # 按 x+y 求和:和最小的是左上角,和最大的是右下角
    s = pts.sum(axis=1)
    rect[0] = pts[np.argmin(s)]   # 左上
    rect[2] = pts[np.argmax(s)]   # 右下
    # 按 x-y 求差:差最小的是右上角,差最大的是左下角
    diff = np.diff(pts, axis=1)
    rect[1] = pts[np.argmin(diff)]  # 右上
    rect[3] = pts[np.argmax(diff)]  # 左下
return rect原理:
-
左上角的
(x+y)最小,右下角的(x+y)最大。 -
右上角
(x-y)最小(因为 x 大 y 小),左下角(x-y)最大(x 小 y 大)。
3. four_point_transform(image, pts):四点透视变换
将原图中由 pts 围成的四边形区域,拉伸成一个矩形(正面俯视效果)。
def four_point_transform(image, pts):
    rect = order_points(pts)
    (tl, tr, br, bl) = rect

    # 计算变换后的宽度(取上边和下边的欧氏距离最大值)
    widthA = np.sqrt(((br[0] - bl[0]) ** 2) + ((br[1] - bl[1]) ** 2))
    widthB = np.sqrt(((tr[0] - tl[0]) ** 2) + ((tr[1] - tl[1]) ** 2))
    maxWidth = max(int(widthA), int(widthB))

    # 计算变换后的高度(取左边和右边的欧氏距离最大值)
    heightA = np.sqrt(((tr[0] - br[0]) ** 2) + ((tr[1] - br[1]) ** 2))
    heightB = np.sqrt(((tl[0] - bl[0]) ** 2) + ((tl[1] - bl[1]) ** 2))
    maxHeight = max(int(heightA), int(heightB))

    # 目标矩形的四个顶点
    dst = np.array([
        [0, 0],
        [maxWidth - 1, 0],
        [maxWidth - 1, maxHeight - 1],
        [0, maxHeight - 1]], dtype="float32")

    # 计算透视变换矩阵并应用
    M = cv2.getPerspectiveTransform(rect, dst)
    warped = cv2.warpPerspective(image, M, (maxWidth, maxHeight))
    return warped
4. sort_contours(cnts, method):按指定方向排序轮廓
cv2.findContours 返回的轮廓顺序是随机的,必须排序才能对应题号和选项顺序。
def sort_contours(cnts, method="left-to-right"):
    reverse = False
    i = 0   # 0表示按x坐标排序,1表示按y坐标排序
    if method in ("right-to-left", "bottom-to-top"):
        reverse = True
    if method in ("top-to-bottom", "bottom-to-top"):
        i = 1
    # 获取每个轮廓的外接矩形 (x, y, w, h)
    boundingBoxes = [cv2.boundingRect(c) for c in cnts]
    # 同时排序轮廓和外接矩形
    (cnts, boundingBoxes) = zip(*sorted(zip(cnts, boundingBoxes),
                                        key=lambda b: b[1][i], reverse=reverse))
return (cnts, boundingBoxes)关键技术:zip 打包轮廓和边界框 → 按 x 或 y 排序 → zip(*) 解包,实现两者同步排序。
5. cv_show(name, img):显示图像的辅助函数
def cv_show(name, img):
    cv2.imshow(name, img)
    cv2.waitKey(0)
    cv2.destroyWindow(name)
五、主流程实现
步骤1:读取图像与预处理
image = cv2.imread('./images/test_01.png')
if image is None:
    print("错误:图片路径不正确")
    exit()
contours_img = image.copy()

gray = cv2.cvtColor(image, cv2.COLOR_BGR2GRAY)
blurred = cv2.GaussianBlur(gray, (5, 5), 0)   # 高斯滤波去噪
cv_show('1. 高斯模糊后', blurred)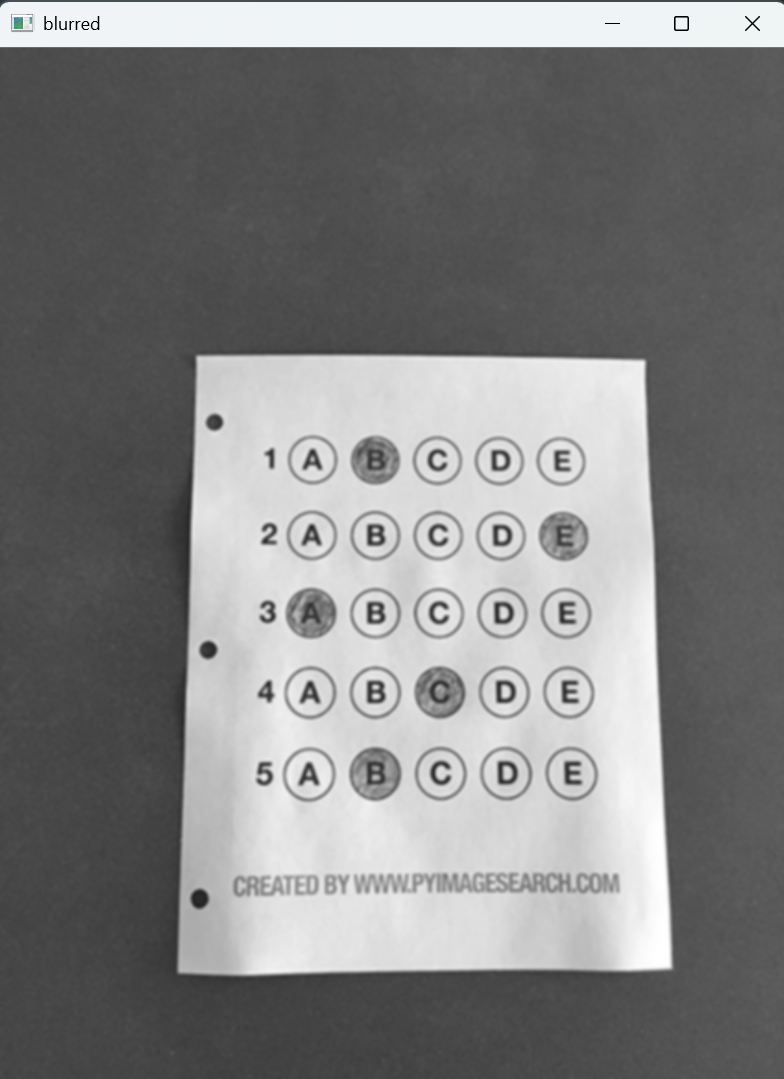
步骤2:Canny边缘检测
edged = cv2.Canny(blurred, 75, 200)
cv_show('edged', edged)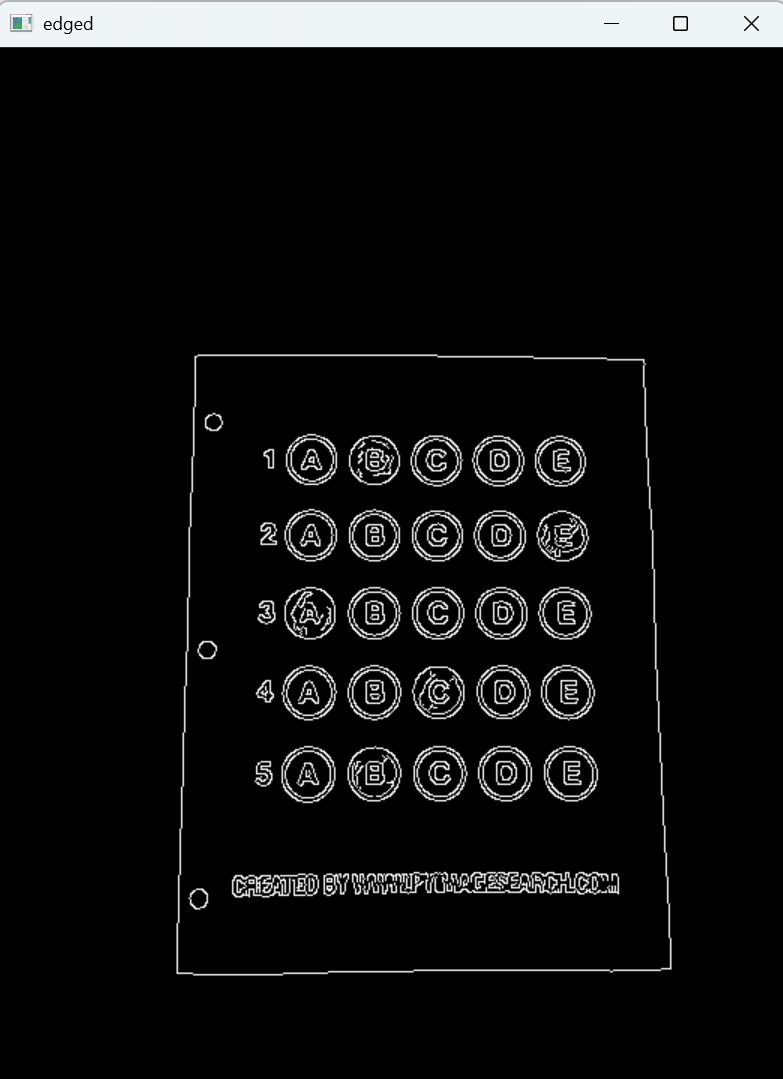
步骤3:轮廓检测,定位答题卡外轮廓
cnts = cv2.findContours(edged.copy(), cv2.RETR_EXTERNAL, cv2.CHAIN_APPROX_SIMPLE)[-2]
cv2.drawContours(contours_img, cnts, -1, (0,0,255), 3)
cv_show('3. 所有外轮廓', contours_img)

# 按面积降序排序,找到四边形轮廓
cnts = sorted(cnts, key=cv2.contourArea, reverse=True)
docCnt = None
for c in cnts:
    peri = cv2.arcLength(c, True)
    approx = cv2.approxPolyDP(c, 0.02 * peri, True)
    if len(approx) == 4:
        docCnt = approx
        break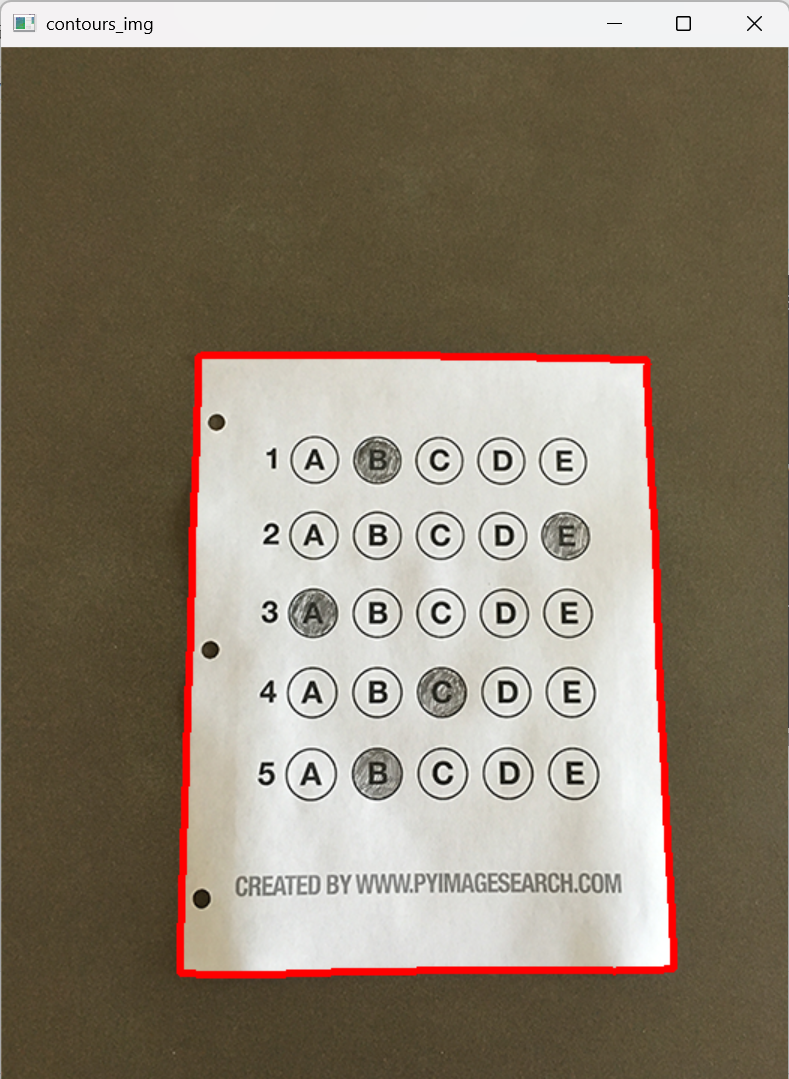
步骤4:透视变换,矫正答题卡
warped_t = four_point_transform(image, docCnt.reshape(4, 2))
warped_new = warped_t.copy()   # 用于最终绘制结果
cv_show('4. 透视矫正后', warped_t)

warped_gray = cv2.cvtColor(warped_t, cv2.COLOR_BGR2GRAY)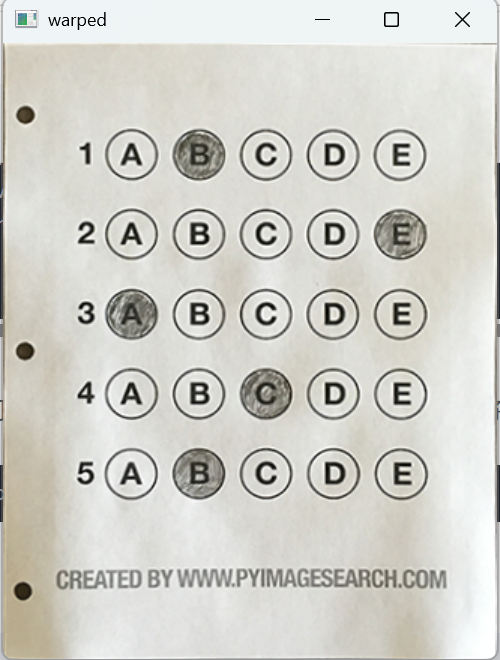
步骤5:二值化处理
使用 THRESH_BINARY_INV | THRESH_OTSU 自动阈值,将涂黑区域变为白色(255),背景变为黑色(0)。
thresh = cv2.threshold(warped_gray, 0, 255,
                       cv2.THRESH_BINARY_INV | cv2.THRESH_OTSU)[1]
cv_show('5. 二值化(反相+OTSU)', thresh)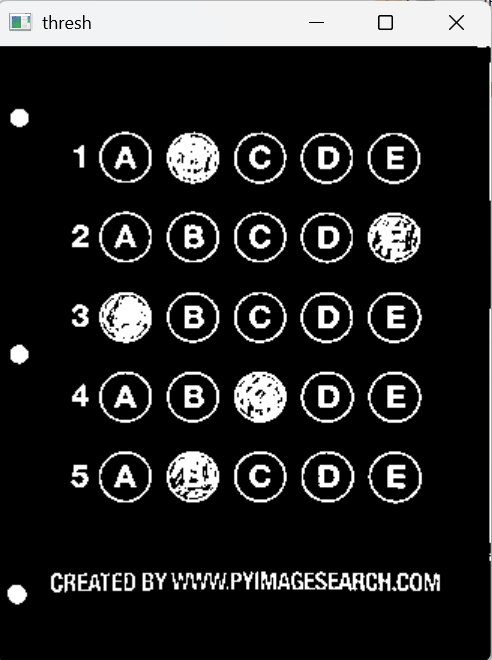
步骤6:识别所有选项圆圈轮廓
cnts = cv2.findContours(thresh, cv2.RETR_EXTERNAL, cv2.CHAIN_APPROX_SIMPLE)[-2]
warped_contours = cv2.drawContours(warped_t.copy(), cnts, -1, (0,255,0), 1)
cv_show('6. 所有轮廓', warped_contours)

questionCnts = []
for c in cnts:
    (x, y, w, h) = cv2.boundingRect(c)
    ar = w / float(h)
    # 筛选条件:大小合适,宽高比接近1(圆形或近似圆形)
    if w >= 20 and h >= 20 and 0.9 <= ar <= 1.1:
        questionCnts.append(c)

print(f"检测到选项圆圈数量:{len(questionCnts)}")   # 应为25(5题×5选项)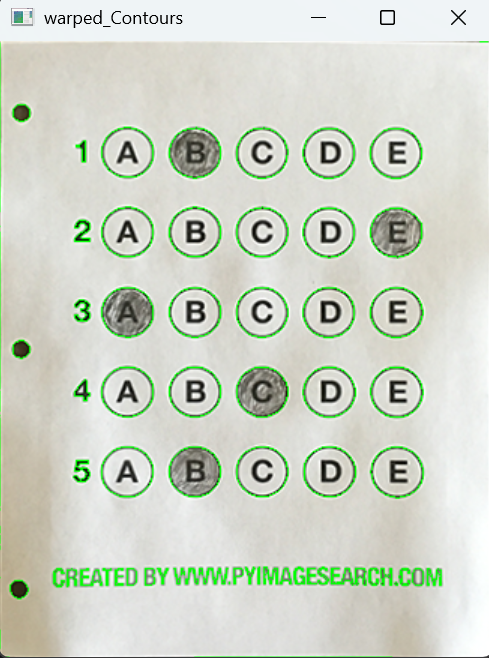
步骤7:按行排序并逐题识别
# 先按从上到下排序,确保第一行的题目在前
questionCnts = sort_contours(questionCnts, method="top-to-bottom")[0]
correct = 0

# 每5个选项为一题
for (q, i) in enumerate(np.arange(0, len(questionCnts), 5)):
    # 对当前题的5个选项按从左到右排序(A B C D E顺序)
    cnts = sort_contours(questionCnts[i:i+5])[0]
    bubbled = None

    # 遍历每个选项,统计涂黑区域的像素数
    for (j, c) in enumerate(cnts):
        mask = np.zeros(thresh.shape, dtype="uint8")
        cv2.drawContours(mask, [c], -1, 255, -1)   # 填充当前选项圆圈
        masked = cv2.bitwise_and(thresh, thresh, mask=mask)
        total = cv2.countNonZero(masked)          # 涂黑面积

        if bubbled is None or total > bubbled[0]:
            bubbled = (total, j)   # 保存最大面积及对应索引

    # 与标准答案对比
    color = (0, 0, 255)   # 默认红色(错误)
    if ANSWER_KEY[q] == bubbled[1]:
        color = (0, 255, 0)   # 绿色(正确)
        correct += 1

    cv2.drawContours(warped_new, [cnts[bubbled[1]]], -1, color, 3)
    cv_show(f'7. 第{q+1}题识别结果', warped_new)
步骤8:计算得分并显示
score = (correct / len(ANSWER_KEY)) * 100
print(f"答对题数:{correct}/{len(ANSWER_KEY)}")
print(f"最终得分:{score:.2f}%")

cv2.putText(warped_new, f"{score:.2f}%", (10, 30),
            cv2.FONT_HERSHEY_SIMPLEX, 0.9, (0, 0, 255), 2)
cv2.imshow("Original", image)
cv2.imshow("Exam", warped_new)
cv2.waitKey(0)
cv2.destroyAllWindows()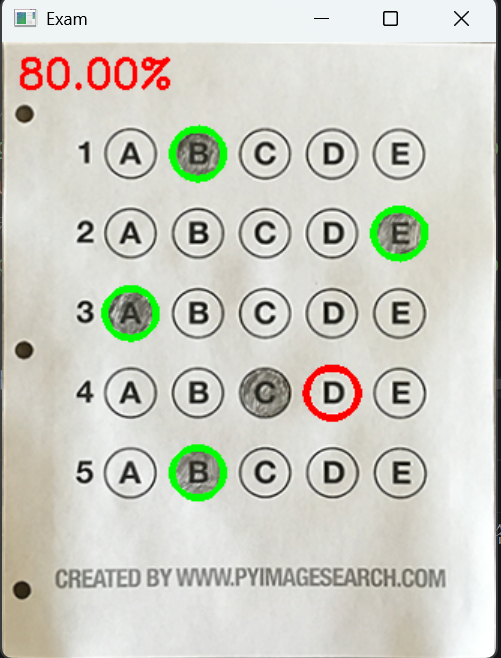
六、完整代码(整合版)
见上文各步骤汇总,或直接复制以下独立脚本:
import numpy as np
import cv2

ANSWER_KEY = {0: 1, 1: 4, 2: 0, 3: 3, 4: 1}

def order_points(pts):
    rect = np.zeros((4, 2), dtype="float32")
    s = pts.sum(axis=1)
    rect[0] = pts[np.argmin(s)]
    rect[2] = pts[np.argmax(s)]
    diff = np.diff(pts, axis=1)
    rect[1] = pts[np.argmin(diff)]
    rect[3] = pts[np.argmax(diff)]
    return rect

def four_point_transform(image, pts):
    rect = order_points(pts)
    (tl, tr, br, bl) = rect
    widthA = np.sqrt(((br[0]-bl[0])**2)+((br[1]-bl[1])**2))
    widthB = np.sqrt(((tr[0]-tl[0])**2)+((tr[1]-tl[1])**2))
    maxWidth = max(int(widthA), int(widthB))
    heightA = np.sqrt(((tr[0]-br[0])**2)+((tr[1]-br[1])**2))
    heightB = np.sqrt(((tl[0]-bl[0])**2)+((tl[1]-bl[1])**2))
    maxHeight = max(int(heightA), int(heightB))
    dst = np.array([[0,0],[maxWidth-1,0],[maxWidth-1,maxHeight-1],[0,maxHeight-1]], dtype="float32")
    M = cv2.getPerspectiveTransform(rect, dst)
    return cv2.warpPerspective(image, M, (maxWidth, maxHeight))

def sort_contours(cnts, method="left-to-right"):
    reverse = False
    i = 0
    if method in ("right-to-left", "bottom-to-top"):
        reverse = True
    if method in ("top-to-bottom", "bottom-to-top"):
        i = 1
    boundingBoxes = [cv2.boundingRect(c) for c in cnts]
    (cnts, boundingBoxes) = zip(*sorted(zip(cnts, boundingBoxes),
                                        key=lambda b: b[1][i], reverse=reverse))
    return (cnts, boundingBoxes)

def cv_show(name, img):
    cv2.imshow(name, img)
    cv2.waitKey(0)
    cv2.destroyWindow(name)

# -------------------- 主程序 --------------------
image = cv2.imread('./images/test_01.png')
if image is None:
    print("请检查图片路径")
    exit()
contours_img = image.copy()

gray = cv2.cvtColor(image, cv2.COLOR_BGR2GRAY)
blurred = cv2.GaussianBlur(gray, (5,5), 0)
edged = cv2.Canny(blurred, 75, 200)

cnts = cv2.findContours(edged, cv2.RETR_EXTERNAL, cv2.CHAIN_APPROX_SIMPLE)[-2]
cnts = sorted(cnts, key=cv2.contourArea, reverse=True)
docCnt = None
for c in cnts:
    peri = cv2.arcLength(c, True)
    approx = cv2.approxPolyDP(c, 0.02*peri, True)
    if len(approx) == 4:
        docCnt = approx
        break

warped_t = four_point_transform(image, docCnt.reshape(4,2))
warped_new = warped_t.copy()
warped_gray = cv2.cvtColor(warped_t, cv2.COLOR_BGR2GRAY)
thresh = cv2.threshold(warped_gray, 0, 255, cv2.THRESH_BINARY_INV | cv2.THRESH_OTSU)[1]

cnts = cv2.findContours(thresh, cv2.RETR_EXTERNAL, cv2.CHAIN_APPROX_SIMPLE)[-2]
questionCnts = []
for c in cnts:
    (x,y,w,h) = cv2.boundingRect(c)
    ar = w/float(h)
    if w>=20 and h>=20 and 0.9<=ar<=1.1:
        questionCnts.append(c)

questionCnts = sort_contours(questionCnts, method="top-to-bottom")[0]
correct = 0
for (q, i) in enumerate(np.arange(0, len(questionCnts), 5)):
    cnts = sort_contours(questionCnts[i:i+5])[0]
    bubbled = None
    for (j, c) in enumerate(cnts):
        mask = np.zeros(thresh.shape, dtype="uint8")
        cv2.drawContours(mask, [c], -1, 255, -1)
        masked = cv2.bitwise_and(thresh, thresh, mask=mask)
        total = cv2.countNonZero(masked)
        if bubbled is None or total > bubbled[0]:
            bubbled = (total, j)
    color = (0,0,255)
    if ANSWER_KEY[q] == bubbled[1]:
        color = (0,255,0)
        correct += 1
    cv2.drawContours(warped_new, [cnts[bubbled[1]]], -1, color, 3)

score = (correct / 5.0) * 100
print(f"[INFO] score: {score:.2f}%")
cv2.putText(warped_new, f"{score:.2f}%", (10,30),
            cv2.FONT_HERSHEY_SIMPLEX, 0.9, (0,0,255), 2)

cv2.imshow("Original", image)
cv2.imshow("Exam", warped_new)
cv2.waitKey(0)
cv2.destroyAllWindows()
七、运行结果
运行代码后,会依次弹出以下窗口(你可以根据 cv_show 逐步观察):
-
高斯模糊后 – 图像变得平滑
-
Canny边缘检测 – 答题卡外边框清晰可见
-
所有外轮廓 – 红色线条标出所有轮廓
-
透视矫正后 – 答题卡被拉正
-
二值化(反相+OTSU) – 涂黑区域变为白色
-
所有轮廓 – 绿色圆圈标出所有选项
-
逐题识别结果 – 每道题识别后更新(正确选项绿色框,错误红色框)
-
最终结果 – 同时显示原图和带分数标注的结果图
控制台输出示例:
检测到选项圆圈数量:25
答对题数:4/5
最终得分:80.00%
[INFO] score: 80.00%
八、常见问题与优化建议
-
找不到四边形外轮廓
-
检查Canny的阈值,或增加高斯模糊核大小。
-
确保答题卡外边框在图片中足够明显(可以用黑色笔描边)。
-
-
选项圆圈筛选不全或误筛
-
调整
w>=20 and h>=20的最小尺寸,根据实际图片中选项的像素大小修改。 -
宽高比
0.9~1.1适用于正圆,如果选项是椭圆可适当放宽范围。
-
-
透视变换后图像模糊或扭曲
-
检查
order_points是否排序正确,可以打印四个点位置验证。 -
增大目标图像的宽高计算精度(使用浮点数而非整数)。
-
-
涂黑面积统计不准确
-
如果答题卡有污渍或噪声,可在二值化前增加形态学操作(开运算/闭运算)。
-
当前方法假设考生只涂一个选项且涂满,若涂得很浅可调整二值化阈值。
-
-
答题卡版式不同
-
修改
ANSWER_KEY长度和内容。 -
如果每行选项数量不是5,修改
np.arange(0, len(questionCnts), 5)中的步长。 -
如果选项是横向排列而非纵向,排序逻辑不变(先按y分组,再按x排序)。
-
九、总结
通过本项目,我们实践了以下OpenCV核心技能:
-
图像预处理(灰度、高斯模糊、Canny)
-
轮廓检测与多边形近似
-
透视变换(角点排序、变换矩阵)
-
自定义轮廓排序(按x/y、升序/降序)
-
掩膜操作提取感兴趣区域
-
像素统计判断填涂结果
这是一个非常经典的计算机视觉入门项目,你可以基于此扩展到多页答题卡、手写数字识别等更复杂的应用。
如果本文对你有帮助,欢迎点赞、收藏、评论!
你的支持是我继续分享的动力 😊

这里是“一人公司”的成长家园。我们提供从产品曝光、技术变现到法律财税的全栈内容,并连接云服务、办公空间等稀缺资源,助你专注创造,无忧运营。
更多推荐


 16
16 0
0- 0


 已为社区贡献5条内容

所有评论(0)