从零开始搭建AI智能体 6:天气查询智能体完整项目
问题分析
结合高德天气API,创建了一个简单天气智能体,代码如下:
from langchain_openai import ChatOpenAI
from langchain.agents import create_agent
from langchain.tools import tool
from langgraph.checkpoint.memory import InMemorySaver
import dotenv, os, requests
from typing import Dict

dotenv.load_dotenv()

@tool
def get_live_weather(city:str) -> str:
    '''
    Return the live weather(实时天气) for the specified city via 高德地图天气API.
    Args:
        city: 城市名称(如"杭州"、"嘉兴",也可以具体到区县,如"上城区")或是城市编码adcode(如"330100"对应"杭州市")
    Returns:
        格式化的天气信息字符串,失败时返回友好提示
    '''
    api_key = os.getenv("AMAP_API_KEY")
    if not api_key:
        print(f"Cannot find GMAP_API_KEY")

    base_url = "https://restapi.amap.com/v3/weather/weatherInfo"

    params: Dict[str, str] = {
        "key": api_key,          # API Key
        "city": city,        # 城市名称或编号
        "extensions": "base",    # base=实时天气,all=预报天气
        "output": "json"         # 返回格式
    }
    try:
        response = requests.get(
            base_url,
            params=params,
            timeout=10          # 超时时间10秒
        )
        response.raise_for_status()  # 触发HTTP错误

        result = response.json()
        if result.get("status") != "1":
            return f"Error: 高德API返回错误 - {result.get('info', '未知错误')}"

        # 提取天气数据(取第一个城市的第一条记录)
        weather_data = result.get("lives", [])
        if not weather_data:
            return f"Error: 未查询到{city}的天气信息"

        live = weather_data[0]
        city = live.get("city", "未知")
        weather = live.get("weather", "未知")
        temperature = live.get("temperature", "未知")
        wind_dir = live.get("winddirection", "未知")
        wind_power = live.get("windpower", "未知")
        report_time = live.get("reporttime","未知")

        return (
            f"{city}实时天气:\n"
            f"天气:{weather}\n"
            f"温度:{temperature}℃\n"
            f"风向:{wind_dir}\n"
            f"风力:{wind_power}级\n"
            f"report_time: {report_time}"
        )

    except requests.exceptions.Timeout:
        return f"Error: 调用高德API超时({city})"
    except requests.exceptions.RequestException as e:
        return f"Error: 调用高德API失败 - {str(e)}"
    except Exception as e:
        return f"Error: 解析天气数据失败 - {str(e)}"


llm = ChatOpenAI(
    model = "qwen3.5-plus",
    api_key=os.getenv("DASHSCOPE_API_KEY"),
    base_url="https://dashscope.aliyuncs.com/compatible-mode/v1",
    temperature=0.2,
)

graph = create_agent(
    model=llm,
    tools=[get_live_weather],
    system_prompt='''You are an helpful assistant.''',
    checkpointer=InMemorySaver(),
)

config = {"configurable": {"thread_id": "user_1"}}
inputs = {
    "messages": [
        {"role": "user", "content": "上海的天气现在怎么样?"},
        {"role": "user", "content": "杭州上城区的天气现在怎么样?"},
        {"role": "user", "content": "这两个地方都下雨吗?"},
    ]
}
resonse = graph.invoke(
    inputs,
    config,
    stream_mode="updates",
)
# print(resonse)

final_answer = None
for update in resonse:
    if 'model' in update and len(update['model']['messages']) > 0:
        msg = update['model']['messages'][0]
        if hasattr(msg, 'content') and msg.content:
            final_answer = msg.content

if final_answer:
    print("智能体最终回答:")
    print(final_answer)
else:
    print("未获取到有效回答")
测试发现,高德API可以识别“杭州”,也能识别“上城区”,但是无法识别“杭州上城区”。查看官方文档可知,API可以接受具体的adcode,因此,可以新增一个函数将城市信息转化为对应的adcode,这样可以避免无法识别的问题。
下面将从零搭建一个完整的天气智能体项目,大致步骤如下:
- 下载城市编码表(相关下载-Web服务 API | 高德地图API)
- 将编码表储存于数据库中
- 新增城市编码转化函数(需要和数据库交互
- 创建智能体
- 进一步:尝试封装为skill
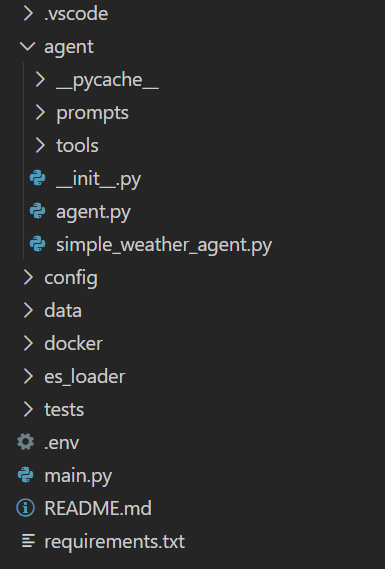
项目架构构建如图所示:
ElasticSearch
首先,确定使用ElasticSearch来储存编码表,ElasticSearch中的插件可以直接实现模糊搜索,而数据库是结构化数据,如果输入错别字,还需要先进行数据清洗。
Docker部署
必须先下载Docker Desktop,然后通过Docker拉取ES镜像(如果C盘不够大,建议提前修改Docker镜像路径),在vscode中打开了git bash终端,输入(ES版本为8.6.2):
docker pull docker.elastic.co/elasticsearch/elasticsearch:8.6.2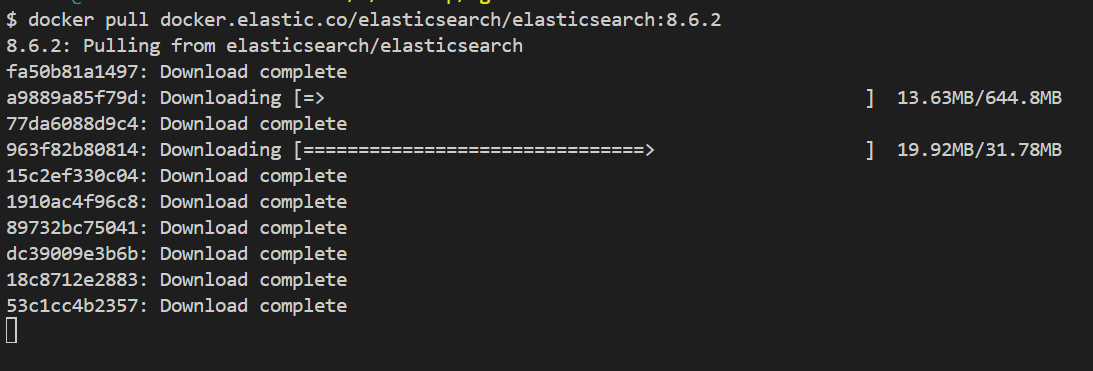
镜像下载完成后,项目中创建docker文件夹,并新建docker-compose.yml文件:
services:
  elasticsearch:
    image: docker.elastic.co/elasticsearch/elasticsearch:8.6.2
    container_name: es_assistant_agent
    restart: unless-stopped

    environment:
      # Cluster and node configuration
      - cluster.name=assistant-agent-cluster
      - node.name=assistant-agent-node
      - discovery.type=single-node

      # JVM堆内存设置
      - "ES_JAVA_OPTS=-Xms1g -Xmx1g"

      # 开发环境关闭安全认证
      - xpack.security.enabled=false
      - xpack.security.enrollment.enabled=false
      - xpack.security.transport.ssl.enabled=false
      - xpack.security.http.ssl.enabled=false

      # 性能优化
      - indices.memory.index_buffer_size=30%
      - indices.fielddata.cache.size=40%
      - indices.queries.cache.size=20%

      # 禁用GeoIP下载(加速启动)
      - ingest.geoip.downloader.enabled=false

      # 允许跨域(方便调试)
      - http.cors.enabled=true
      - http.cors.allow-origin="*"
      - http.cors.allow-headers=X-Requested-With,Content-Type,Content-Length,Authorization

      # 网络配置
      - network.host=0.0.0.0
      - http.port=9200
      - transport.port=9300

    # 资源限制
    ulimits:
      memlock:
        soft: -1
        hard: -1
      nofile:
        soft: 65536
        hard: 65536

    # 端口映射(使用9202避免与其他ES冲突)
    ports:
      - "9202:9200"  # REST API端口
      - "9302:9300"  # 节点间通信端口

    # 数据卷挂载(所有数据都在项目目录下,会被gitignore)
    volumes:
      # 数据目录
      - ./data:/usr/share/elasticsearch/data
      # 插件目录(IK分词器等)
      - ./plugins:/usr/share/elasticsearch/plugins
      # 日志目录
      - ./logs:/usr/share/elasticsearch/logs
      # 备份目录
      - ./backup:/usr/share/elasticsearch/backup

    # 健康检查
    healthcheck:
      test: ["CMD", "curl", "-f", "http://localhost:9200"]
      interval: 30s
      timeout: 10s
      retries: 5

    # 网络
    networks:
      - assistant-agent-net

networks:
  assistant-agent-net:
    driver: bridge
    name: assistant_agent_network
启动ES
打开终端:
cd docker

# 创建容器,启动ES
docker-compose up -d
打开http://localhost:9202,查看网页。
安装IK分词器
进入ES容器,出现sh-5.0$说明成功:
docker exec -it es_assistant_agent sh
sh-5.0$
安装IK分词器,链接最后的版本号要与ES的版本相同:
./bin/elasticsearch-plugin install https://get.infini.cloud/elasticsearch/analysis-ik/8.6.2下载完成后重启ES容器并检查,得到analysis-ik说明成功:
    sh-5.0$ exit
docker restart elasticsearch
docker exec -it elasticsearch sh
    sh-5.0$ ./bin/elasticsearch-plugin list
    analysis-ik
代码编写
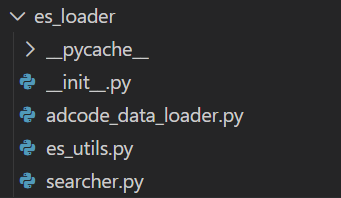
在es_loader文件夹下,完成ES相关脚本。
python中需要下载和es版本相同的elsticsearch库。
es_utils
代码中主要实现了获取es客户端,创建index和删除index三个功能。
adcode_data_loader
先提前将下载好的adcode文件(excel)放到data文件夹下。
代码中主要流程是:加载Excel → 数据预处理 → 连接ES → 创建索引 → 生成文档 → 批量导入。
searcher
创建一个Elasticsearch位置搜索模块,提供了对行政区划数据的多种查询能力。
get_adcode_by_location
最后在agent/tools下的weather_tool脚本中,创建tool:
def get_adcode_by_location(query:str) -> Dict[str, str]:
    '''
    Return the adcode for the specified location.
    Args:
        query: location name (包括省、市、区县的单独或组合名称,如"杭州市"、"西湖区"、"浙江省杭州市西湖区")
    Returns:
        adcode信息字典, 失败时返回友好提示
    '''
    searcher = get_searcher()
    adcode = searcher.get_adcode(query)
    if not adcode:
        return {"error": f"未找到位置 '{query}' 的adcode"}
    return {"adcode": adcode, "location": query}
Agent
agent路径下新建agent.py,将agent封装为class:
from langchain_openai import ChatOpenAI
from langchain.agents import create_agent
from langgraph.checkpoint.memory import InMemorySaver
from config.settings import LLM_MODEL, LLM_API_KEY, LLM_BASE_URL
from agent.tools.weather_tool import get_adcode_by_location, get_live_weather
import pprint

class WeatherAgent:
    def __init__(self):
        self.llm = ChatOpenAI(
            model = LLM_MODEL,
            api_key = LLM_API_KEY,
            base_url = LLM_BASE_URL,
            temperature = 0.2,
        )

        self.graph = create_agent(
            model=self.llm,
            tools=[get_adcode_by_location,get_live_weather],
            system_prompt='''You are an helpful assistant.''',
            checkpointer=InMemorySaver(),
        )


    def run(self, messages, thread_id="default_user"):
        """
        Args:
        messages: [
            {"role": "user", "content": "..."}
        ]
        """

        config = {"configurable": {"thread_id": thread_id}}

        response_stream = self.graph.invoke(
            {"messages": messages},
            config,
            stream_mode="updates",
        )

        final_answer = None

        for update in response_stream:
            pprint.pprint(update)

            if "model" in update and len(update["model"]["messages"]) > 0:
                msg = update["model"]["messages"][0]
                if hasattr(msg, "content") and msg.content:
                    final_answer = msg.content

        return final_answer
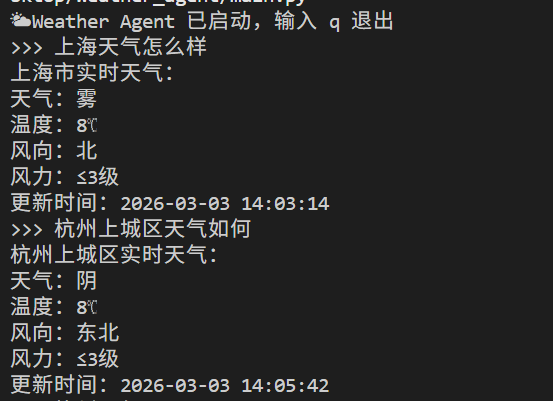
根目录下main,py作为统一入口,调用大模型,结果演示如下:
主要难点就是上面那些内容,感兴趣的朋友可以访问仓库: https://github.com/idonnot/assistant_agent.git

这里是“一人公司”的成长家园。我们提供从产品曝光、技术变现到法律财税的全栈内容,并连接云服务、办公空间等稀缺资源,助你专注创造,无忧运营。
更多推荐


 22
22 0
0- 0


 已为社区贡献9条内容

所有评论(0)