10分钟上手Open Interpreter AppleScript:Mac自动化脚本全攻略
你是否还在为重复的Mac操作浪费时间?每次手动调整窗口布局、批量处理文件或定时执行任务时,是否希望有更高效的解决方案?本文将带你掌握Open Interpreter中的AppleScript(苹果脚本)自动化能力,通过10个实战案例从零构建Mac专属自动化工作流,让你的电脑真正为你"打工"。读完本文你将获得:- 3种方式快速运行AppleScript自动化脚本- 5类系统控制API全解析(...
10分钟上手Open Interpreter AppleScript:Mac自动化脚本全攻略
【免费下载链接】open-interpreter  项目地址: https://gitcode.com/GitHub_Trending/ope/open-interpreter
你是否还在为重复的Mac操作浪费时间?每次手动调整窗口布局、批量处理文件或定时执行任务时,是否希望有更高效的解决方案?本文将带你掌握Open Interpreter中的AppleScript(苹果脚本)自动化能力,通过10个实战案例从零构建Mac专属自动化工作流,让你的电脑真正为你"打工"。
读完本文你将获得:
- 3种方式快速运行AppleScript自动化脚本
- 5类系统控制API全解析(窗口/文件/通知/剪贴板/日历)
- 10个即抄即用的自动化模板(含代码注释)
- 错误处理与调试的专业技巧
- 从基础到进阶的完整学习路径图
一、AppleScript与Open Interpreter:重新定义Mac效率
1.1 为什么选择AppleScript而非Python/Shell?
| 特性 | AppleScript | Python | Shell |
|---|---|---|---|
| Mac系统集成度 | ★★★★★(原生支持所有应用) | ★★★☆☆(需第三方库) | ★★★☆☆(部分功能受限) |
| GUI操作能力 | ★★★★★(直接控制窗口/按钮) | ★★☆☆☆(依赖PyAutoGUI) | ★☆☆☆☆(几乎不支持) |
| 学习曲线 | ★★★☆☆(类英语语法) | ★★★★☆(通用编程概念) | ★★★★☆(命令式语法) |
| 应用兼容性 | ★★★★★(所有Cocoa应用) | ★★★☆☆(需应用提供接口) | ★★☆☆☆(主要支持命令行) |
| Open Interpreter集成 | ★★★★★(原生支持) | ★★★★☆(需手动调用) | ★★★★☆(需手动调用) |
AppleScript是macOS专属的自动化语言,能够直接与系统服务和图形界面交互,这是其他语言无法比拟的优势。而Open Interpreter则为其提供了AI辅助编写能力,让你无需死记语法即可快速生成复杂脚本。
1.2 Open Interpreter中的AppleScript工作原理
Open Interpreter通过以下机制增强AppleScript能力:
- 自动添加执行行标记(
##active_line)实现分步调试 - 内置错误捕获与修复建议
- 支持中文指令直接生成脚本
- 整合系统剪贴板/文件系统/通知中心
二、环境准备:3分钟启动你的第一个自动化脚本
2.1 安装Open Interpreter(三种方式)
# 方式1:源码安装(推荐开发者)
git clone https://gitcode.com/GitHub_Trending/ope/open-interpreter
cd open-interpreter
poetry install
poetry run interpreter

# 方式2:PIP安装(推荐普通用户)
pip install open-interpreter
interpreter

# 方式3:一键安装脚本(适合新手)
curl -fsSL https://gitcode.com/GitHub_Trending/ope/open-interpreter/raw/main/installers/oi-mac-installer.sh | bash
2.2 验证AppleScript环境
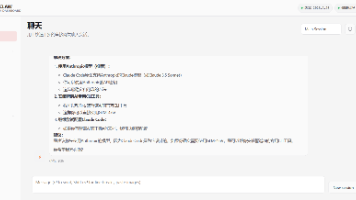
打开Open Interpreter后输入以下指令,验证系统是否已正确配置:
interpreter> 运行AppleScript检查系统版本
预期输出:
log "##active_line1##"
tell application "System Events"
    get system version
end tell
执行结果应显示你的macOS版本号(如"14.5"代表Sonoma系统)。
2.3 配置开发环境(可选)
| 工具 | 作用 | 安装命令 |
|---|---|---|
| Script Editor | AppleScript官方编辑器 | 预装在/Applications/Utilities/ |
| Visual Studio Code | 代码高亮与调试 | brew install --cask visual-studio-code |
| osascript | AppleScript命令行执行工具 | 系统预装 |
三、核心API全解析:掌控Mac的每个角落
3.1 窗口管理:告别手动调整的烦恼
-- 案例1:将Safari窗口移动到左上角并调整大小
tell application "Safari"
    activate -- 激活应用
    set bounds of window 1 to {0, 24, 800, 600} -- {x, y, 宽度, 高度}
    set zoomed of window 1 to false -- 取消最大化
end tell
关键属性说明:
bounds:位置与尺寸,格式为{左边距, 上边距, 右边距, 下边距}zoomed:布尔值,控制窗口是否最大化visible:控制窗口显示/隐藏name:获取/设置窗口标题
3.2 文件操作:比Finder快10倍的批量处理
-- 案例2:批量重命名下载文件夹中的图片
tell application "Finder"
    set targetFolder to folder "Downloads" of home
    set fileList to every file of targetFolder whose name ends with ".jpg"

    repeat with i from 1 to count of fileList
        set currentFile to item i of fileList
        set newName to "vacation-" & (i as string) & ".jpg"
        set name of currentFile to newName
    end repeat
end tell
常用文件操作方法:
duplicate:复制文件move:移动文件delete:删除文件到废纸篓make new folder:创建文件夹get POSIX path:获取Unix风格路径
3.3 通知中心:让系统主动提醒你
-- 案例3:任务完成时发送通知
display notification "周报已生成并发送" with title "自动化助手" subtitle "Office工作流" sound name "default"
通知参数详解:
with title:主标题(必填)subtitle:副标题(可选)sound name:提示音效("default"或不指定)content image:通知图标(需提供文件路径)
3.4 剪贴板操作:无缝传递数据
-- 案例4:提取剪贴板内容并转换为大写
set clipboardText to the clipboard as text
set upperText to do shell script "echo " & quoted form of clipboardText & " | tr '[:lower:]' '[:upper:]'"
set the clipboard to upperText
display notification "剪贴板内容已转换为大写"
剪贴板高级用法:
the clipboard as «class PNGf»:获取PNG图片set the clipboard to (path to desktop picture) as alias:复制文件路径get the clipboard info:查看剪贴板内容类型
3.5 日历集成:自动化日程管理
-- 案例5:添加会议到日历
tell application "Calendar"
    set newEvent to make new event at end of events of calendar "工作" with properties {¬
        summary:"团队周会", ¬
        start date:date "2025年9月20日 09:30:00", ¬
        end date:date "2025年9月20日 10:30:00", ¬
        location:"会议室A", ¬
        description:"讨论Q3进度与问题"}
    make new attendee at end of attendees of newEvent with properties {name:"张三", email:"zhangsan@example.com"}
end tell
事件属性说明:
summary:事件标题start/end date:开始/结束时间(格式严格)location:地点description:详细说明attendee:参与者(支持添加多个)
四、实战案例库:10个场景化自动化模板
4.1 办公效率类
案例6:自动整理下载文件夹
-- 将下载文件夹文件按类型分类
tell application "Finder"
    set downloadFolder to folder "Downloads" of home
    set docTypes to {{"pdf", "Documents/PDFs"}, {"docx", "Documents/Word"}, {"xlsx", "Documents/Excel"}, {"jpg", "Pictures"}, {"zip", "Downloads/Archives"}}

    repeat with fileType in docTypes
        set ext to item 1 of fileType
        set dest to item 2 of fileType
        set targetFiles to every file of downloadFolder whose name ends with "." & ext

        if (count of targetFiles) > 0 then
            set destFolder to folder dest of home
            if not (exists destFolder) then
                make new folder at home with properties {name:dest}
            end if
            move targetFiles to destFolder
            display notification "已移动" & (count of targetFiles) & "个" & ext & "文件"
        end if
    end repeat
end tell
案例7:PPT演示自动控制
-- 开始Keynote演示并设置定时翻页
tell application "Keynote"
    activate
    open document "产品发布会.key"
    start presentation of document 1
    delay 30 -- 第一张停留30秒
    repeat 5 times -- 翻5页
        tell application "System Events" to key code 124 -- 右箭头
        delay 20 -- 每页停留20秒
    end repeat
    tell application "System Events" to key code 53 -- 退出演示
end tell
4.2 系统管理类
案例8:夜间模式自动切换
-- 日落时分自动开启深色模式
tell application "System Events"
    tell appearance preferences
        set dark mode to true
    end tell
end tell

tell application "Safari"
    set style of window 1 to dark mode
end tell

display notification "已切换至夜间工作模式" with title "系统自动化"
案例9:定时清理内存
-- 释放系统内存
do shell script "purge" -- 清空系统缓存
tell application "Activity Monitor"
    activate
    delay 2
    quit
end tell
display notification "系统内存已清理" with title "系统维护"
4.3 创意设计类
案例10:批量处理图片
-- 使用预览应用批量调整图片大小
tell application "Preview"
    activate
    set imageFiles to choose file with multiple selections allowed of type {"public.image"}
    set outputFolder to choose folder with prompt "选择输出文件夹"

    repeat with imgFile in imageFiles
        open imgFile
        tell document 1
            set dimensions to get dimensions
            set newWidth to 1024
            set newHeight to (dimensions's item 2) * newWidth / (dimensions's item 1)
            resize image to dimensions {newWidth, newHeight}
            save in (outputFolder & (name of imgFile) as string)
            close
        end tell
    end repeat
end tell
五、高级技巧:从脚本到工作流
5.1 错误处理机制
-- 带错误捕获的文件操作
try
    tell application "Finder"
        move file "important.docx" to folder "备份"
    end tell
on error errMsg number errNum
    display dialog "操作失败: " & errMsg & " (错误代码: " & errNum & ")" buttons {"重试", "取消"} default button 1
    if button returned of result is "重试" then
        -- 重试逻辑
        tell application "Finder"
            move file "important.docx" to folder "备份"
        end tell
    end if
end try
常见错误代码:
-43:文件未找到-1728:应用不支持该操作-10006:权限不足
5.2 与Shell命令混合使用
-- AppleScript与Shell结合处理CSV数据
set csvData to do shell script "curl https://example.com/data.csv"
set jsonData to do shell script "echo " & quoted form of csvData & " | csvjson"
set the clipboard to jsonData
display notification "CSV数据已转换为JSON并复制到剪贴板"
5.3 定时执行脚本
通过macOS自带的Automator与Calendar配合:
- 打开Automator → 新建"日历提醒"
- 选择"运行AppleScript"操作
- 粘贴脚本代码
- 保存并在Calendar中设置定时触发
六、学习资源与进阶路径
6.1 资源推荐清单
| 类型 | 推荐资源 | 适用阶段 |
|---|---|---|
| 官方文档 | AppleScript Language Guide | 入门到中级 |
| 在线教程 | Mac Automation Scripting Guide | 中级到高级 |
| 社区论坛 | MacScripter.net | 问题解决 |
| 代码库 | GitHub AppleScript Examples | 实战参考 |
| 工具集 | Script Debugger | 高级调试 |
6.2 能力提升路线图
6.3 常见问题解决
-
Q: 脚本执行时提示权限不足?
A: 系统设置 → 隐私与安全性 → 自动化 → 勾选对应应用权限 -
Q: 如何让脚本在后台运行?
A: 使用nohup osascript script.scpt &命令或Automator创建后台服务 -
Q: 新版macOS不再支持某些命令?
A: 检查系统完整性保护(SIP)状态,关键路径操作可能需要关闭SIP
七、总结与展望
AppleScript与Open Interpreter的结合,为Mac用户打开了自动化的全新可能。从简单的通知提醒到复杂的多应用协作,从日常办公到专业创作,自动化脚本都能成为你提高效率的秘密武器。
随着macOS的不断更新,AppleScript也在持续进化,未来我们可以期待:
- 更深度的AI集成(自然语言直接控制)
- 跨设备自动化(与iPhone/iPad协同)
- 更强大的系统API(如Shortcuts集成)
现在就选择一个案例开始实践吧!记住,最好的自动化脚本是能解决你实际问题的脚本。如果遇到困难,随时在Open Interpreter中描述你的需求,AI会帮你生成定制化的解决方案。
如果你觉得本文有帮助,请点赞收藏,并关注获取更多自动化技巧!
下期预告:《用AppleScript打造个人智能助理》
【免费下载链接】open-interpreter 项目地址: https://gitcode.com/GitHub_Trending/ope/open-interpreter

这里是“一人公司”的成长家园。我们提供从产品曝光、技术变现到法律财税的全栈内容,并连接云服务、办公空间等稀缺资源,助你专注创造,无忧运营。
更多推荐

 19
19 0
0- 0


 已为社区贡献4条内容

所有评论(0)